There’s something undeniably special about a handmade gift. It carries a weight, a story, and a piece of the creator that a store-bought item simply can’t match. But what if you could take that sentiment a step further? Imagine stitching a cherished memory directly into fabric, transforming a snapshot of a loved one, a beloved pet, or a favorite place into a beautiful, tactile work of art. This is the magic of modern crafting, where technology meets tradition to create something truly one-of-a-kind. The best part? You don’t need to be a graphic designer to get started, thanks to accessible tools that help you convert image to embroidery pattern.
Why Embroider Photos? The Emotional Impact
Let’s be honest, we live in a digital world saturated with images. Our photos live on our phones and in the cloud, often forgotten in the endless scroll. Embroidering a photo changes that dynamic completely. It pulls a digital memory into the physical world, giving it texture, dimension, and a permanent presence. A stitched portrait of a family member becomes a cherished heirloom. A rendering of a childhood home becomes a poignant keepsake. A simple picture of a friend’s favorite flower becomes a deeply personal token of friendship. This process isn’t just about creating a gift; it’s about preserving a moment with thread and needle, infusing it with the time and care it takes to stitch every single detail. The result is a conversation piece, a work of heart that speaks volumes about your relationship with the recipient.
The Journey from Pixel to Stitch: Understanding the Process
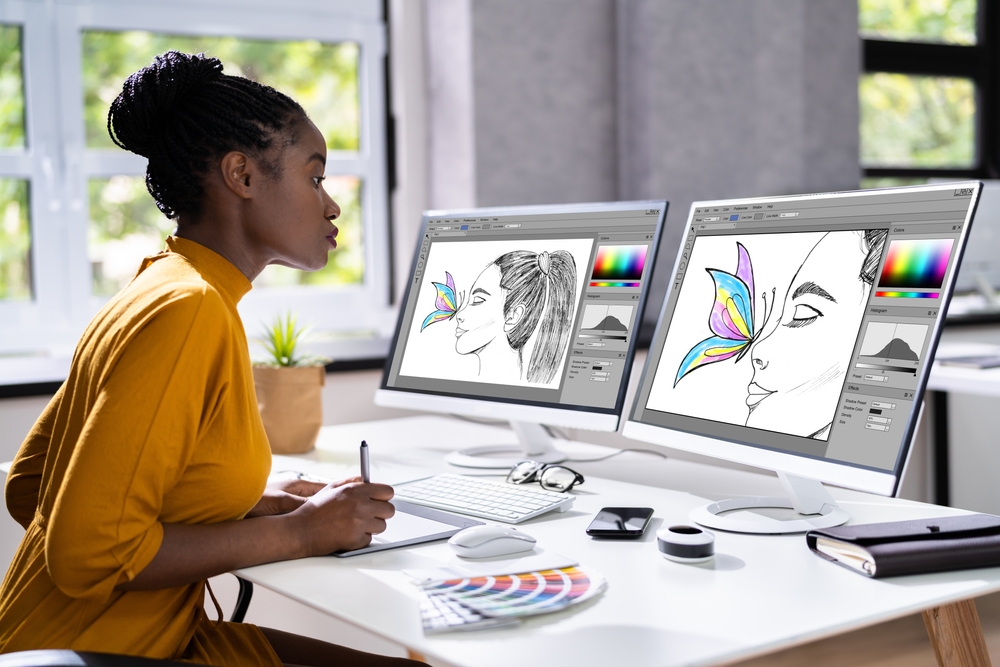
So, how does a photograph, which is made of tiny colored squares called pixels, become an embroidery pattern made of stitches? The process is fascinating and involves a few key steps.
First, you start with the right photo. A high-contrast, clear image with a well-defined subject will always yield the best results. Think of a portrait with a clean background or a landscape with strong lines. Busy, blurry, or dark photos can be challenging for software to interpret accurately.
Next comes the crucial conversion stage. Specialized software, which we’ll discuss more in a moment, analyzes your photo. It looks at the colors, the shapes, and the light and shadow. The software’s job is to translate this visual information into a language your embroidery machine understands: a pattern of different stitch types, colors, and sequences. It decides where to place satin stitches for bold lines, fill stitches for larger areas, and running stitches for fine details.
Finally, you get the embroidery file. This isn’t a universal file type; different embroidery machines read different formats (like .PES for Brother, .DST for Tajima, .XXX for Singer, etc.). The software allows you to save your new creation in the correct format for your specific machine, ready to be stitched out.
Choosing Your Digital Assistant: Software Options for Conversion
This is where the technical magic happens, and you have a range of options, from fully automated to hands-on creative suites.
Automated online converters are a great starting point for beginners. You simply upload your photo, the platform processes it, and you download a file. These are fantastic for their speed and simplicity, but they often offer less control over the final design. They can sometimes misinterpret complex images, so they work best with very clear, simple photos.
For those ready to dive deeper, dedicated digitizing software is the way to go. Programs like Hatch, Embrilliance, or Brother’s PE-Design give you complete control. You can manually adjust the stitch direction, change the density, combine different stitch types, and meticulously edit the color palette. There is a learning curve, but the payoff is a professional-quality pattern that truly does your photo justice. Many of these programs offer free trials, allowing you to test the waters before committing.
You might be wondering about general image editing software like Photoshop or GIMP. While these are powerful tools for photo manipulation, they cannot create a true, stitchable embroidery file. You can use them to pre-edit your photo—increasing contrast, simplifying the background, or converting it to black and white—to prepare it for the actual digitizing software, but they are not a substitute.
Pro Tips for a Flawless Finish
A perfect conversion isn’t just about clicking a button. A little preparation goes a long way in ensuring your stitched masterpiece looks incredible.
Start with image quality. Always choose the highest resolution version of your photo. A crisp, clear source image gives the software more data to work with, resulting in a cleaner pattern.
Simplify your scene. If your photo has a cluttered background, consider using a photo editor to remove it or blur it significantly before conversion. This helps the software focus on your main subject, like a person’s face or a specific object, preventing a messy, over-stitched final product.
Play with contrast. Boosting the contrast between your subject and the background can help the software distinguish edges more effectively. A black and white version of your photo can also be a great way to focus on value and form without the complexity of color.
Embrace imperfection. Remember, you are translating a photo into thread, not printing it on paper. Some details will be lost, and that’s part of the charm. The stylized, textured interpretation is what gives embroidered photos their unique character. Do not strive for photorealistic perfection; strive for emotional resonance.
Stitching Your Story: Bringing Your Pattern to Life
Once your file is ready and saved in the correct format, the real fun begins. Hoop your fabric tightly—this is critical for preventing puckering. Choose your thread colors carefully. While the software will suggest a palette, feel free to swap colors to better match your vision or the decor where the finished piece will live. Stabilizer is your best friend; using the right type and weight for your fabric will ensure your design stitches out smoothly without distortion.
As the machine hums to life and begins its dance, watch as your memory is slowly woven into existence. Each stitch is a building block, and seeing the image emerge from the plain fabric is a rewarding experience unlike any other in crafting.
Conclusion
Converting photos into embroidery files opens up a world of creative and heartfelt possibilities. It bridges the gap between our digital memories and the timeless appeal of handmade crafts. Whether you use a quick online tool or master professional software, the ability to transform a simple snapshot into a stitched heirloom is a powerful skill. So, dig through those photo albums on your phone, find that perfect picture, and start the journey of creating a gift that is not just personalized, but profoundly personal. Your next cherished keepsake is just a conversion away.


Leave a comment